Re: Topcat's Other Misc Weird Build Thread
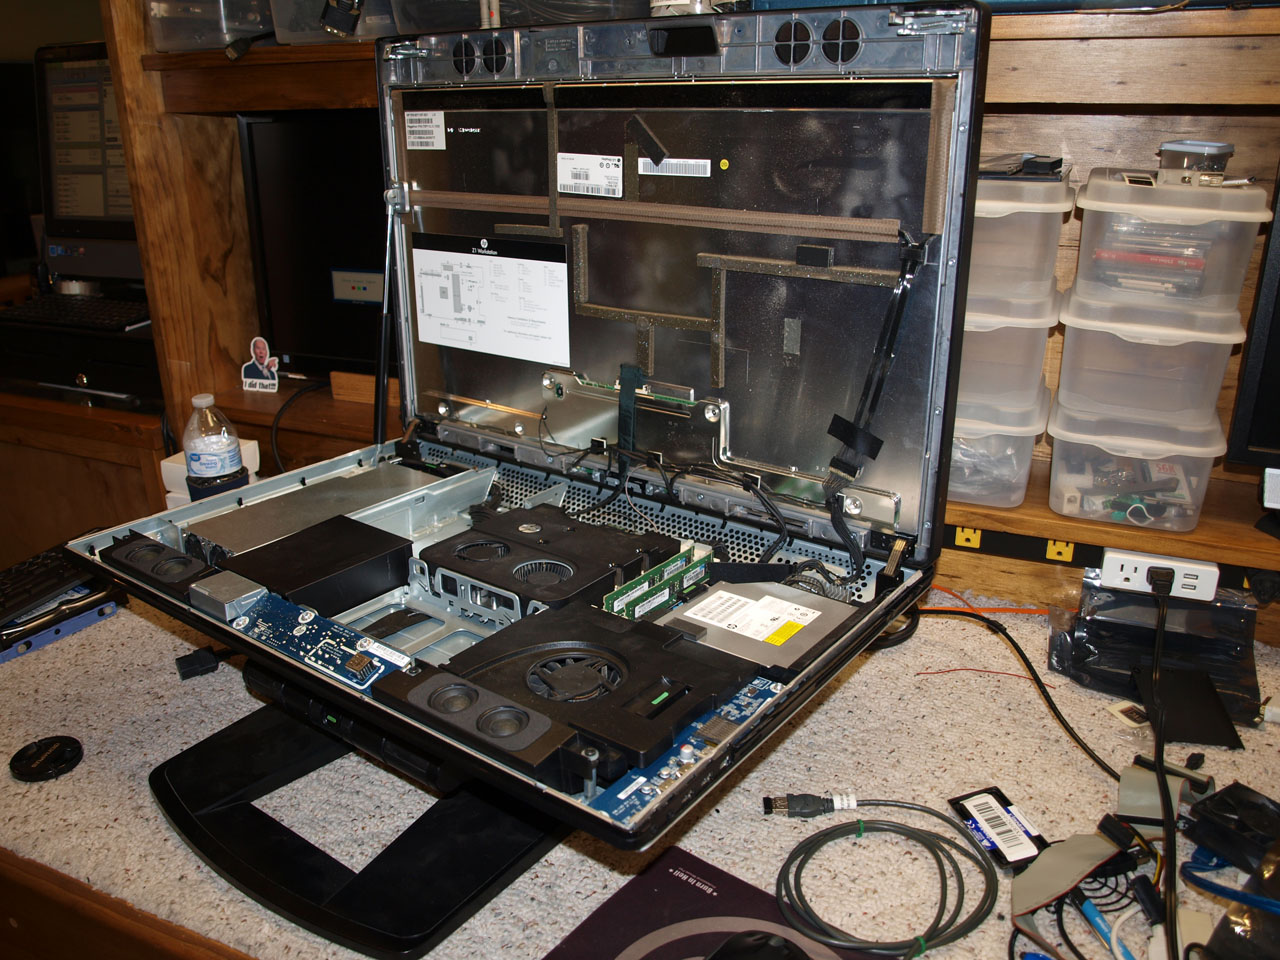
Here's another neat one....not quite worthy of its own thread, but great for this one! I acquired two of these in the last couple weeks and have had some fun hotrodding them, they are quite buildable! These are probably the nicest AIO's I've ever seen, especially for something more modern. Full size motherboard, socketed CPU, long DIMM & ECC support, RAID support, MXM slot for GPU upgrades.....and I already mentioned the gas-charged lift arm for opening the hood!!
Refresher pics:


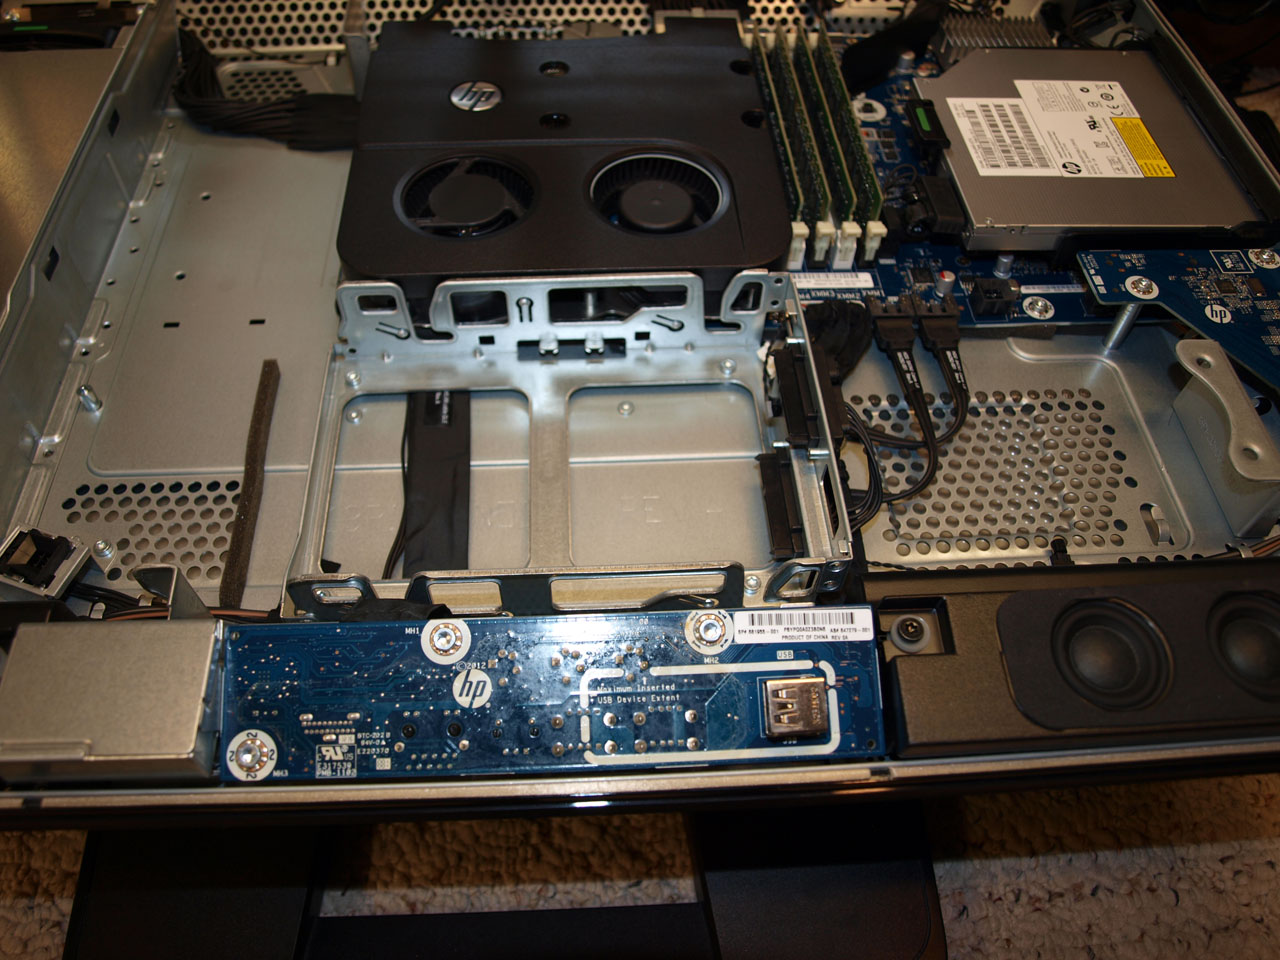
Now, the point of today's post....One of these was missing the HDD caddy. They're apparently nothing standard, and nearly impossible to find. I did locate one on ebay, and the buffoon had it priced @ $100 + ship and no 'best offer', it was the only one I found....I refuse to pay that for a little piece of plastic....
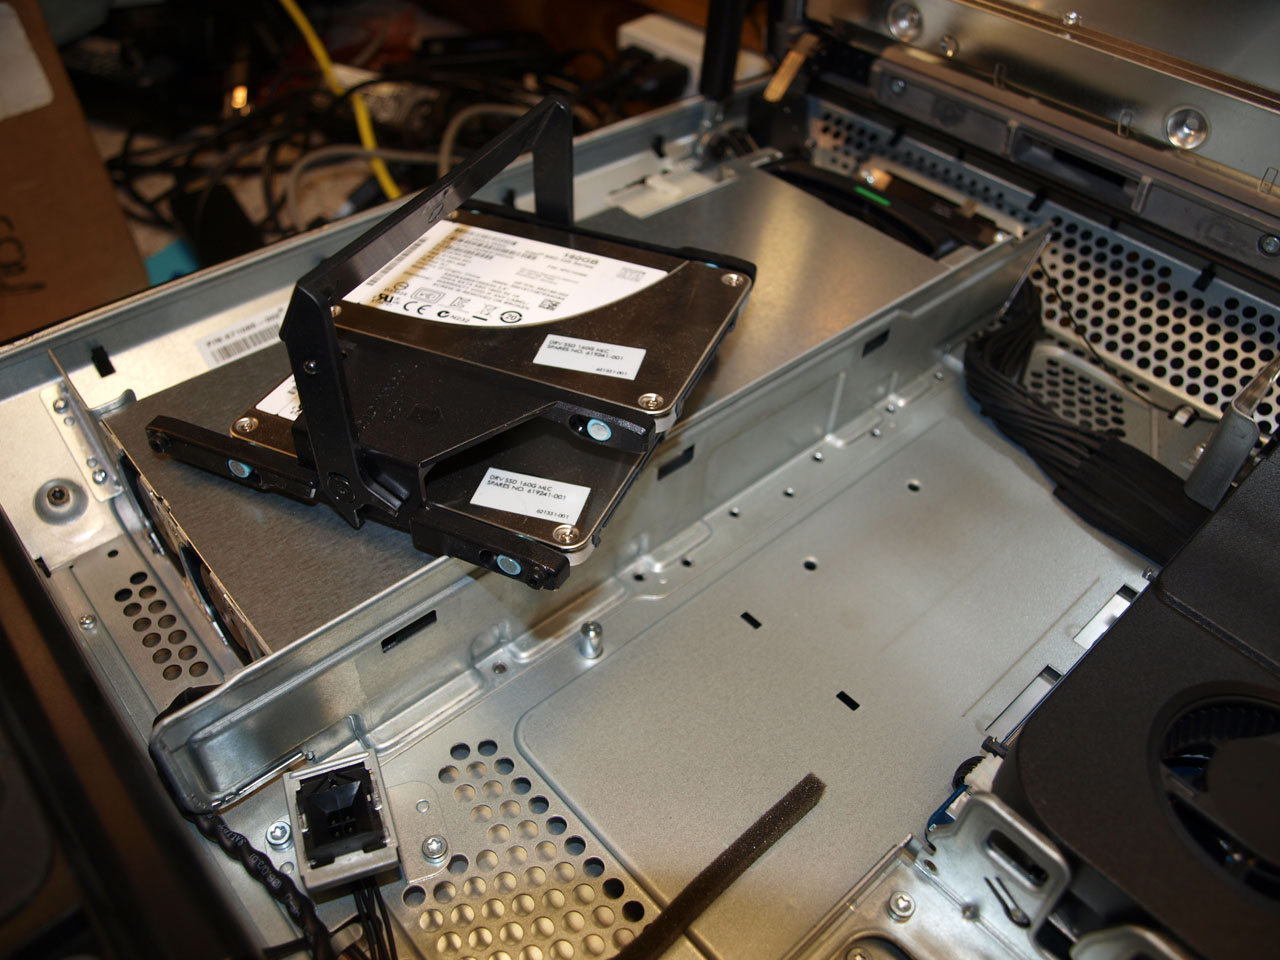
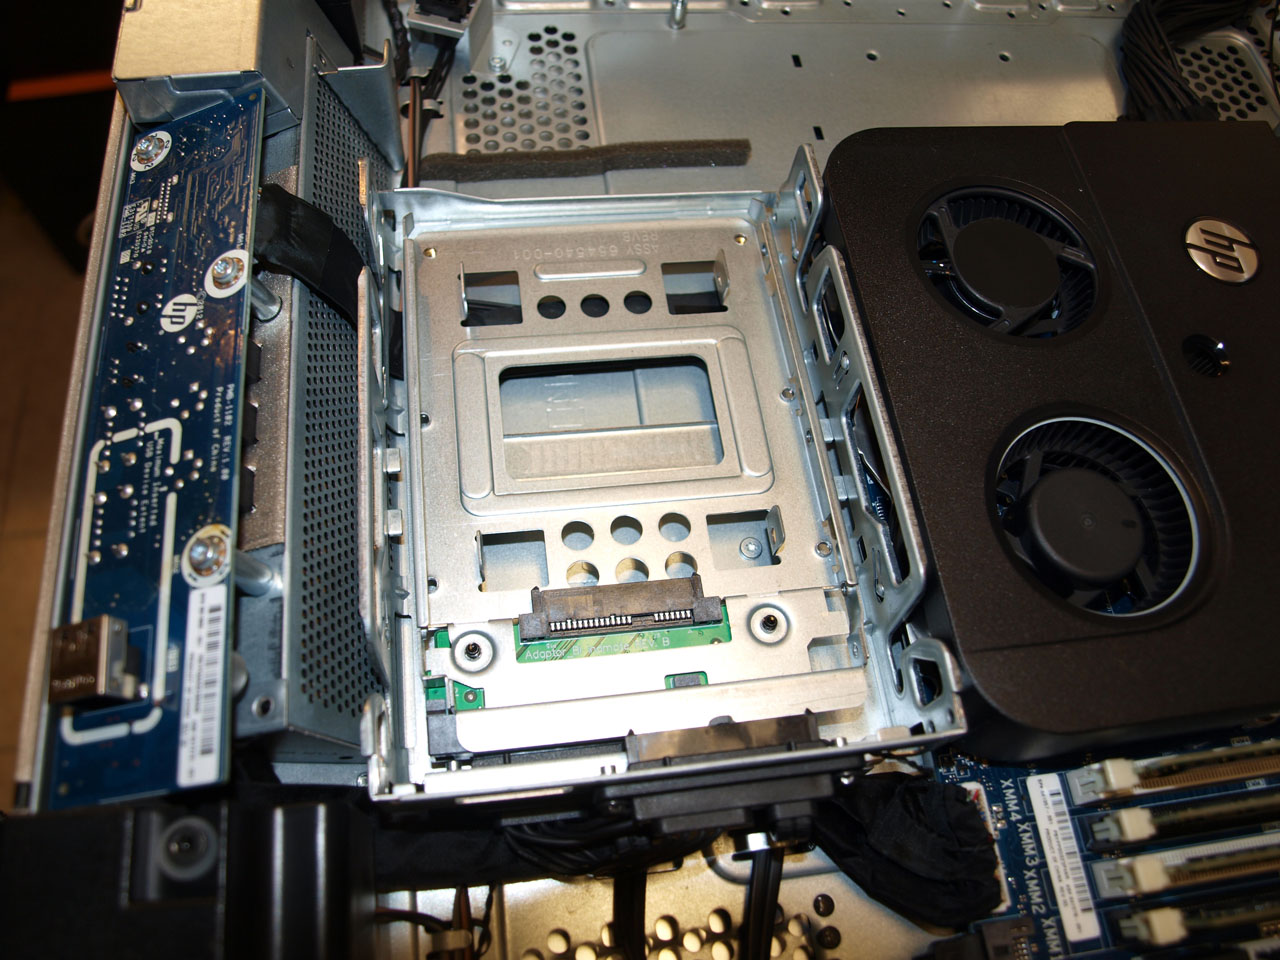
...so here we are...where the HDD's reside....
This is what the plastic caddy looks like.
Yea, now you see why I'm not paying a hundred bucks for that little piece of plastic.... This system is being built out for my wife, she's due for an upgrade and constantly grumbles about the tower & clusterflunk of wires under her desk.... It only need a single drive, not two....so lets get creative!!
Ironically enough, enter in a HP 2.5" to 3.5" SAS adapter. These can be had on ebay all day long for ~$8 shipped.
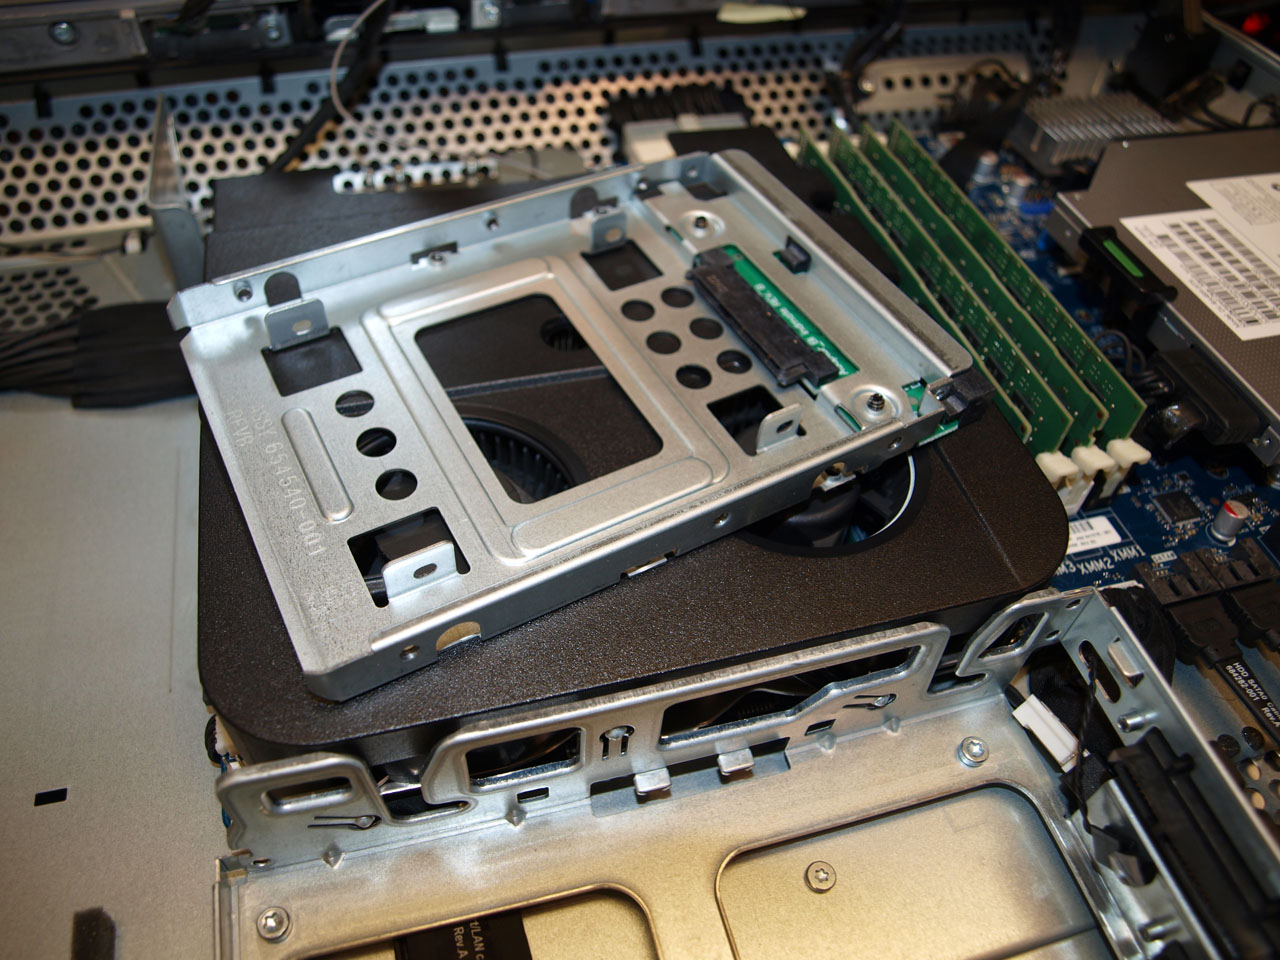
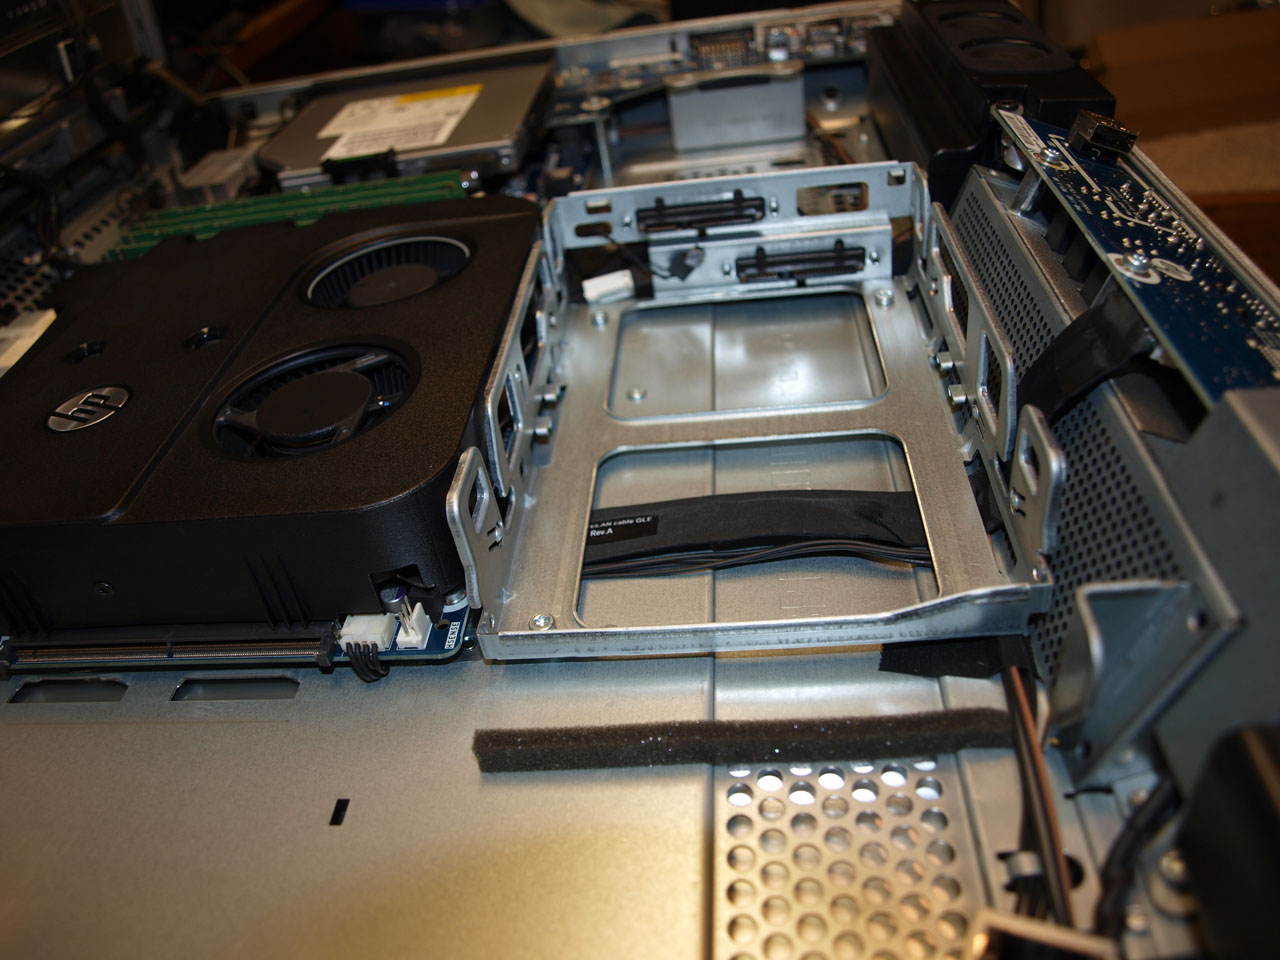
Plugs in....but absolutely nothing to attach it to. Standard screw layout for a 3.5" drive do not even begin to line up with the tracks on the onboard HDD cage.
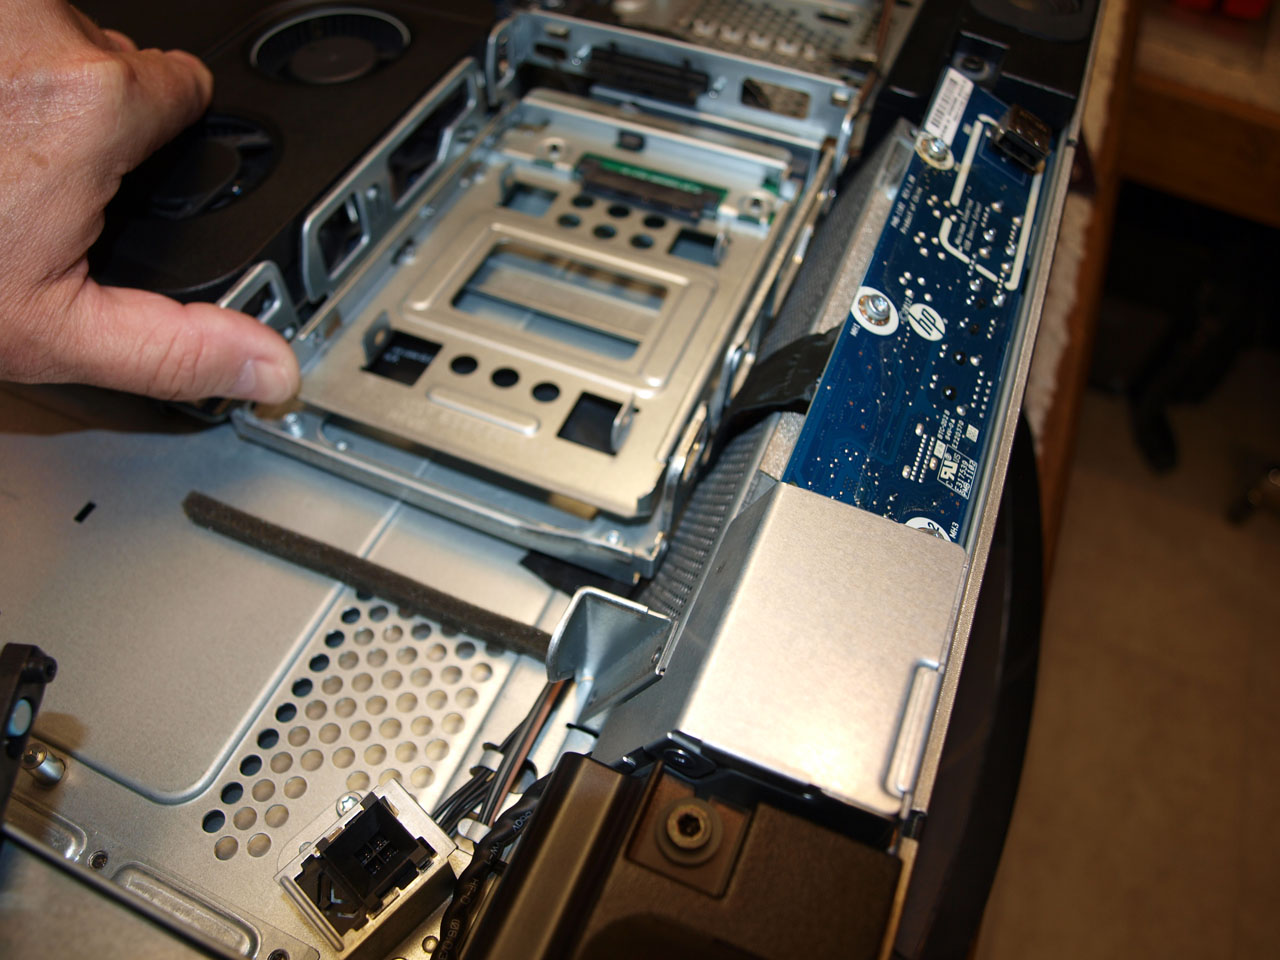
...so I start by drilling 2x 1/8" holes in the AFT end of the HDD tray.
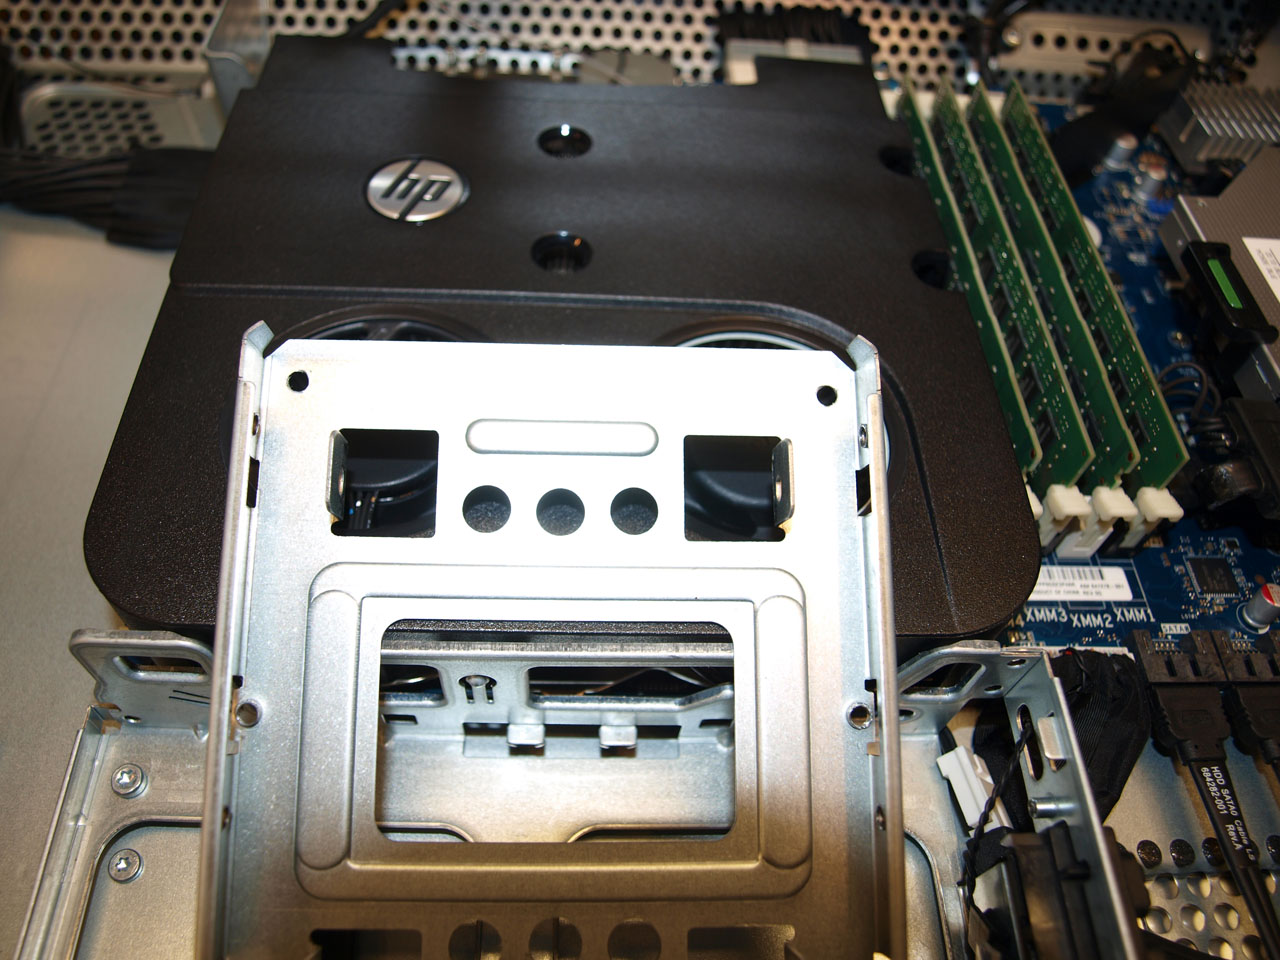
Next, I mark the location of the above shown drilled holes in the cage base and drill those out.
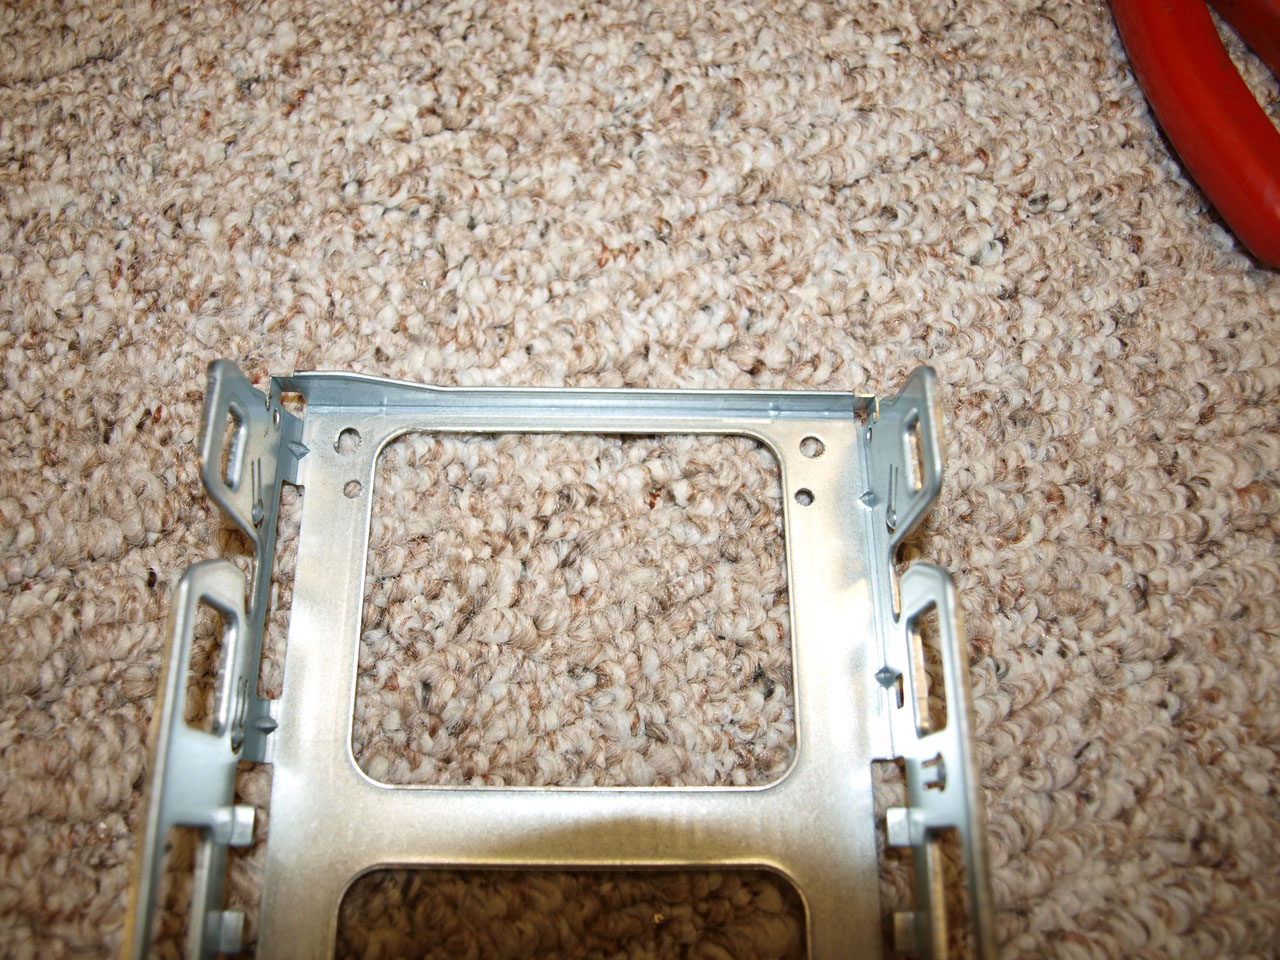
Next step is some 8mm brass case standoffs. These will allow the tray to be level inside the cage, so it won't stress the drive connect header.
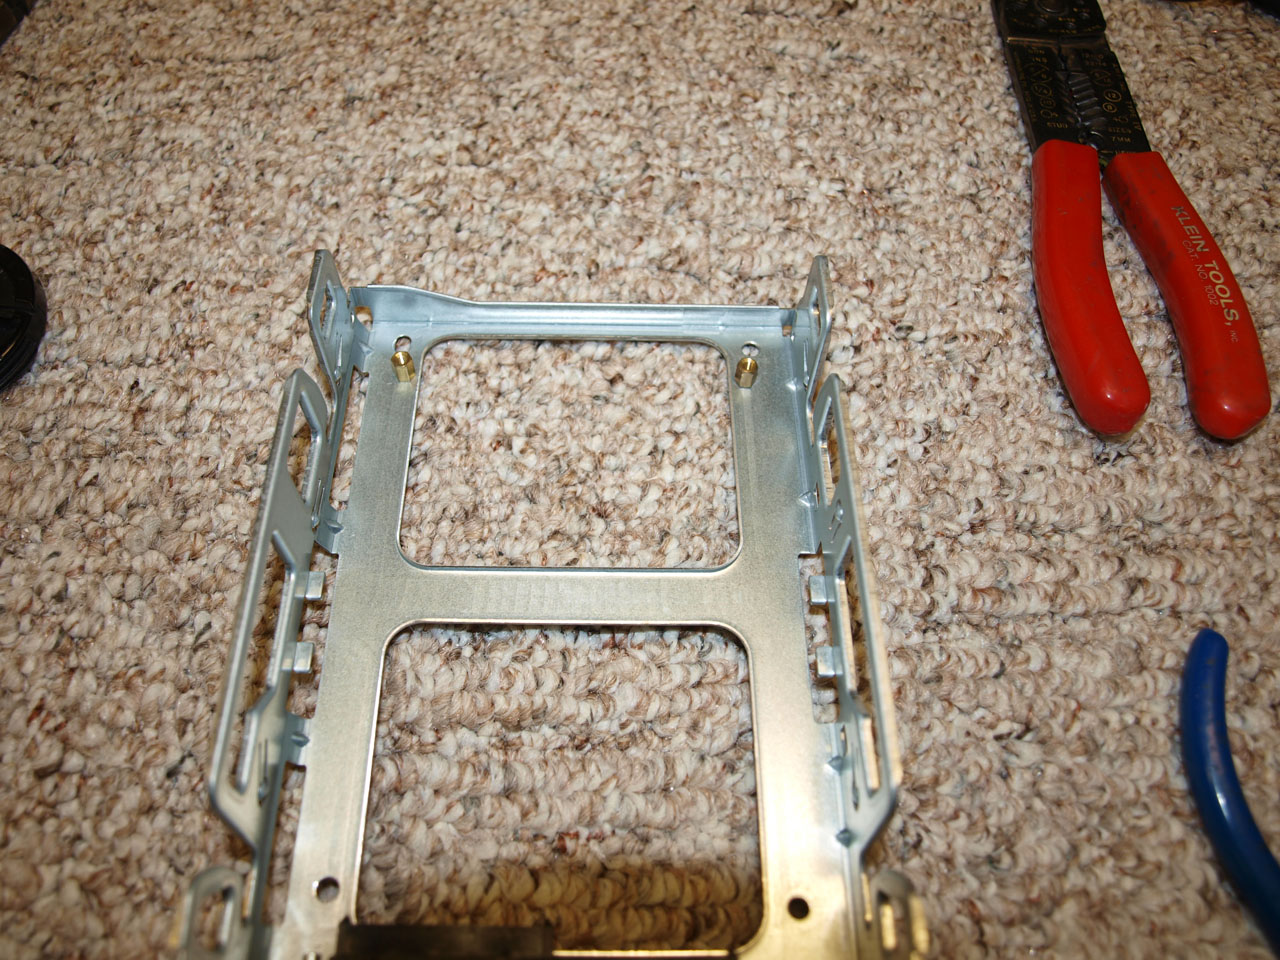
Nuts on the back end. The cage is mounted on standoffs inside the AIO, these nuts clear the floor of the AIO case by a good 2mm.
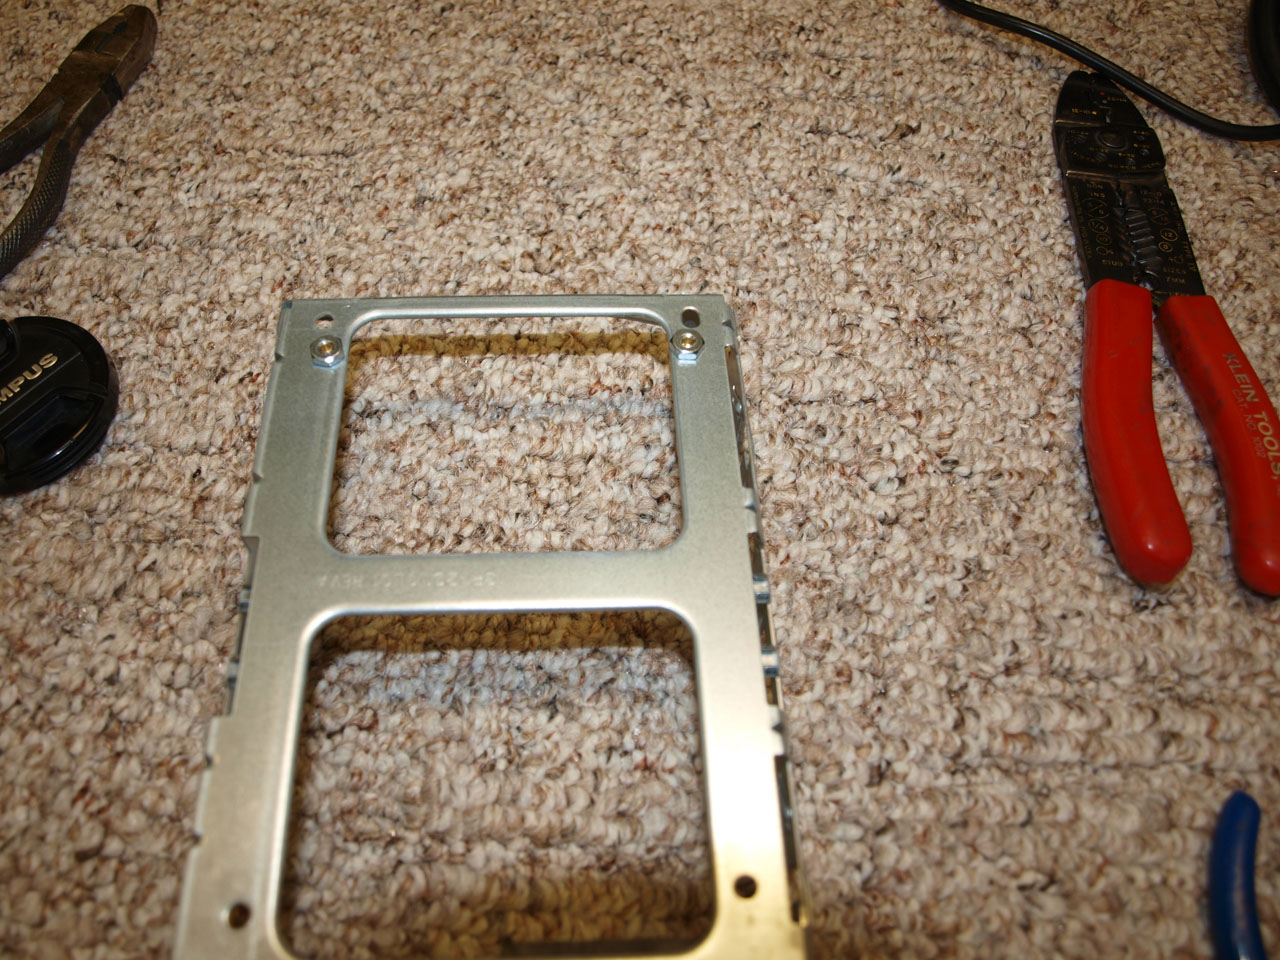
Perfect!
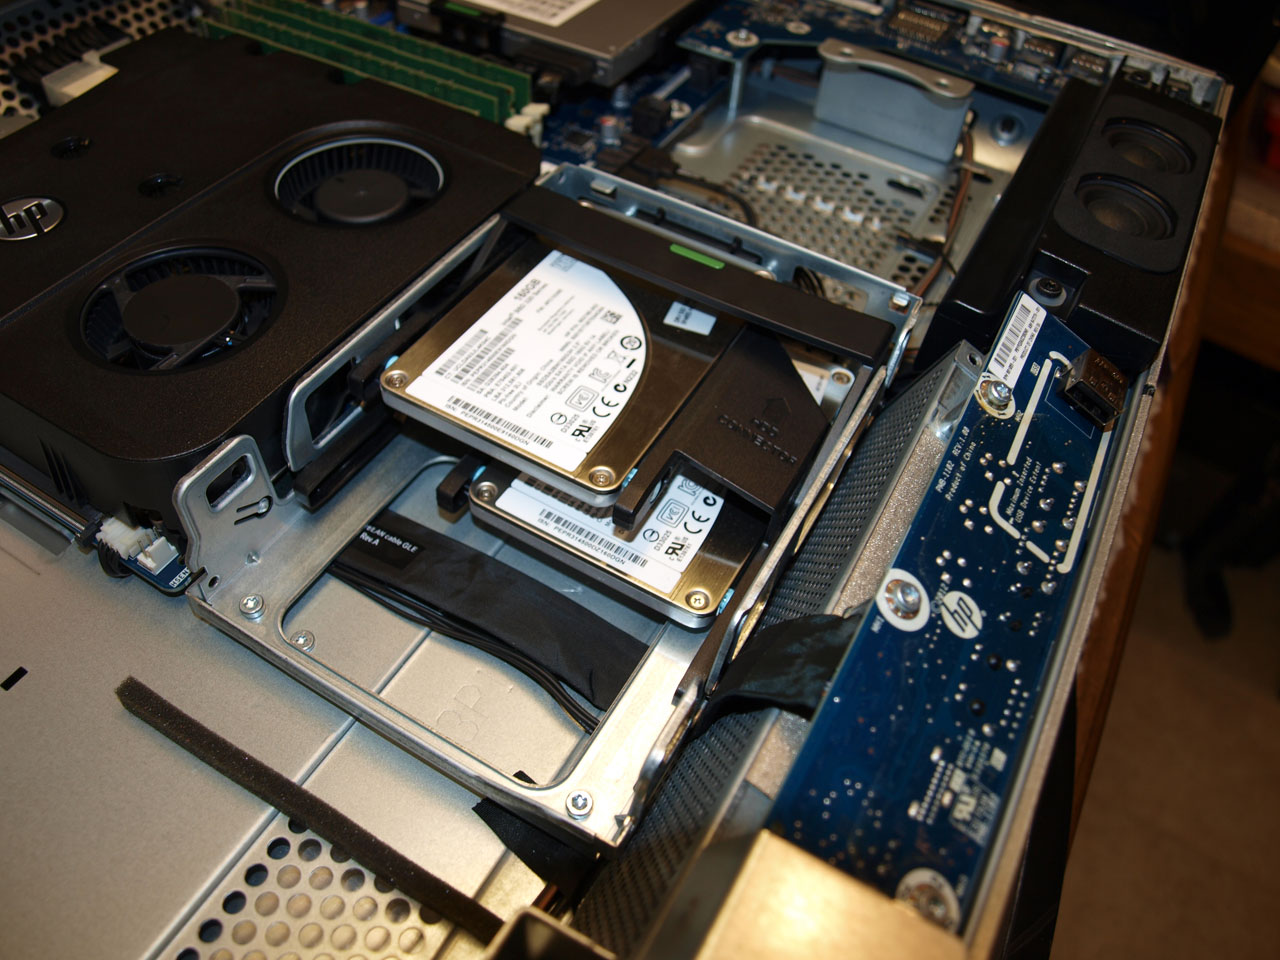
480GB SSD installed.

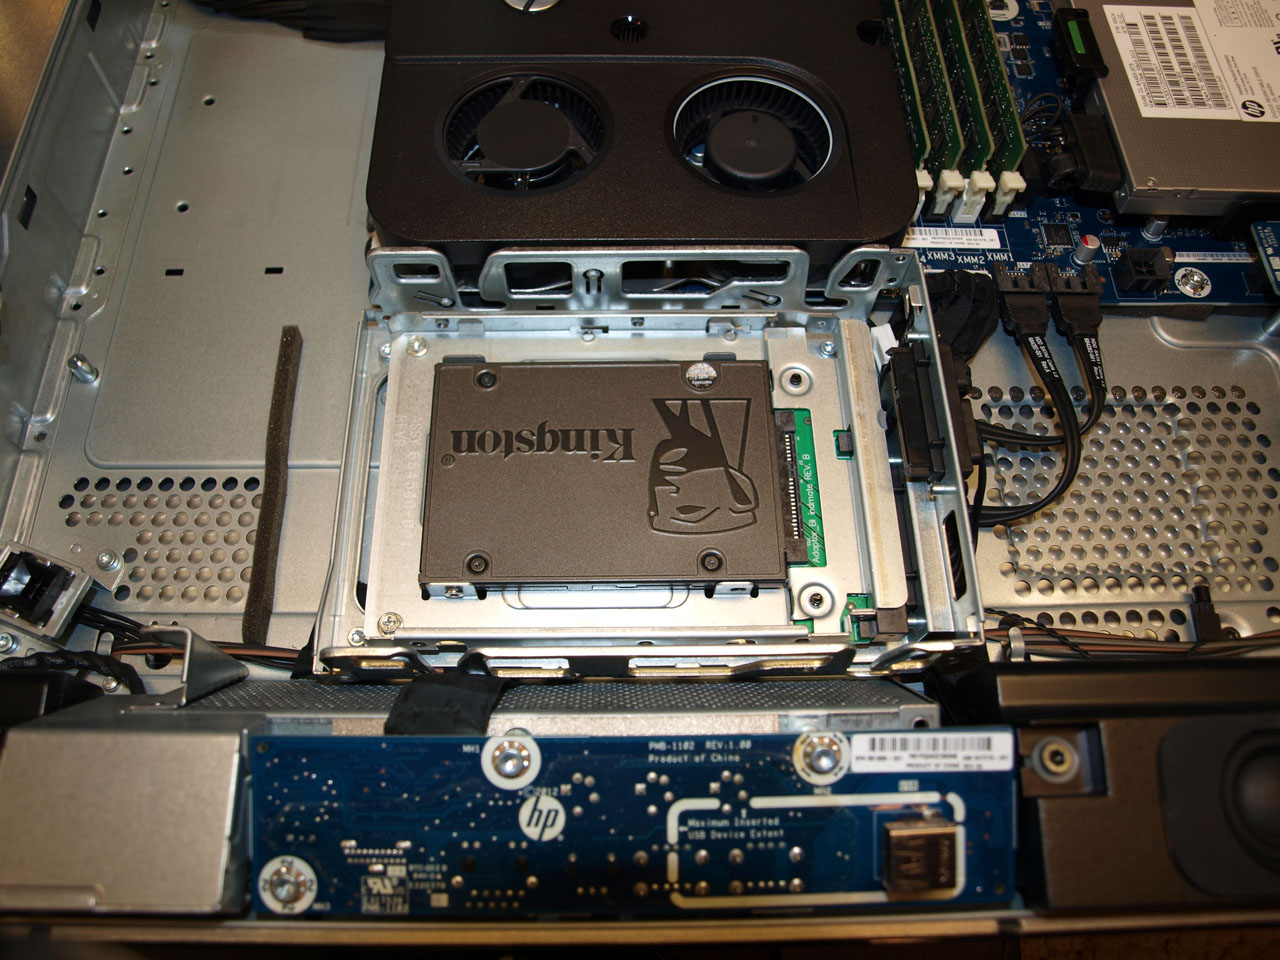
Like it was born there!! Everything reassembled.
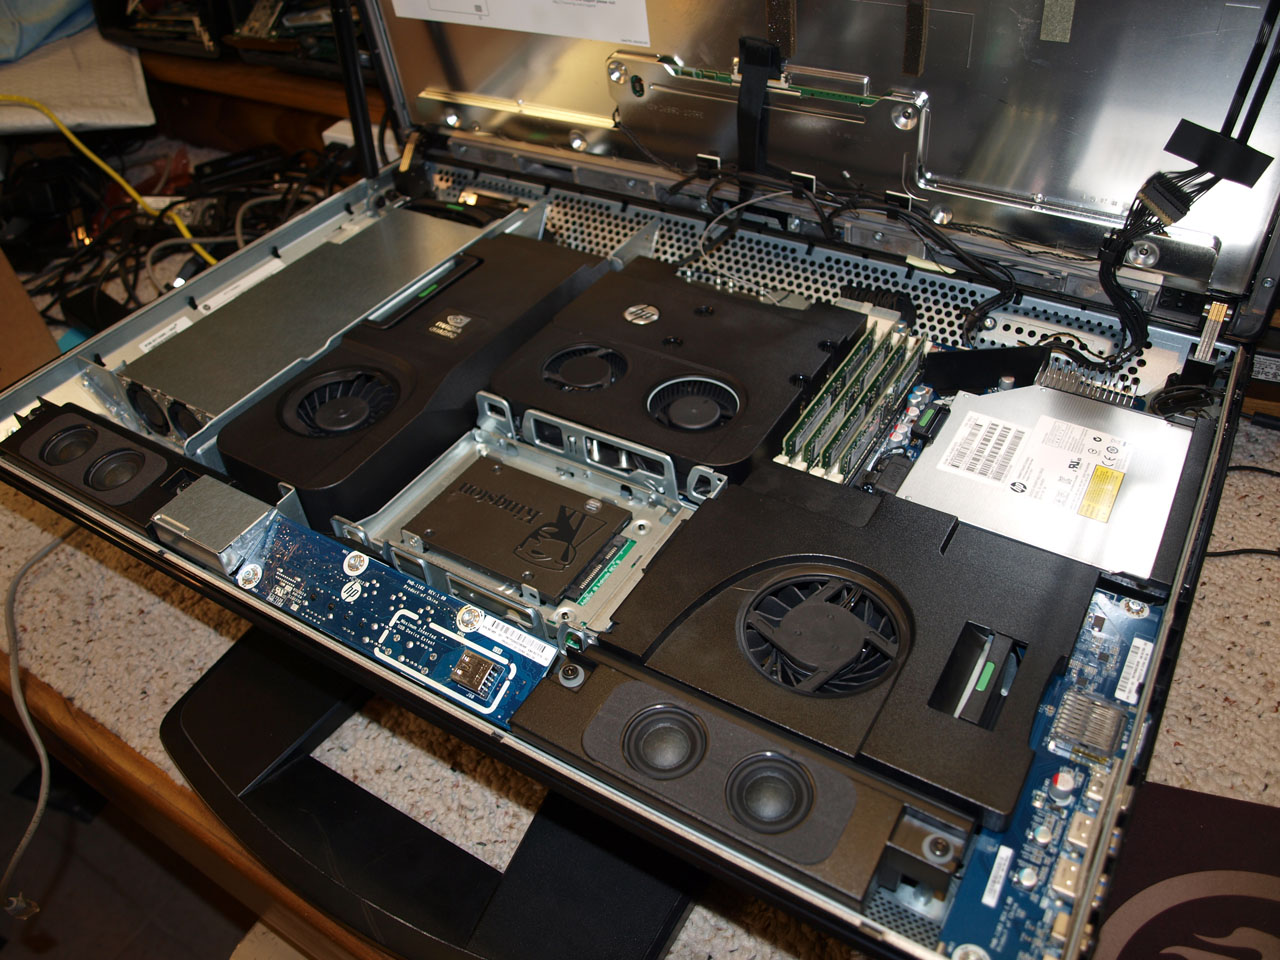
Win10 Enterprise installed. I did bump the MXM GPU up a little. It had a Quadro500M 1GB in it, and it was pretty weaksauce.... I had a Quadro K2200M 2GB in the bin....which is much nicer and will be stellar for what she does. Display is 2560x1440, very nice to look at!

The specs for this rig are:
HP Z1 Workstation AIO
Xeon E3-1280 v2 @ 3.6GHz <-- I also added that
16GB ECC PC3-12800
480GB SSD
Quadro K2200M 2GB GPU
Win10 Enterprise 22H2
The other one I'm building up will be similar to this one....just want to play around with the RAID functions....and I did add a stiffer GPU than this one....I'll give up the details on that one when it's finished....but wifey really likes this so far!
Here's another neat one....not quite worthy of its own thread, but great for this one! I acquired two of these in the last couple weeks and have had some fun hotrodding them, they are quite buildable! These are probably the nicest AIO's I've ever seen, especially for something more modern. Full size motherboard, socketed CPU, long DIMM & ECC support, RAID support, MXM slot for GPU upgrades.....and I already mentioned the gas-charged lift arm for opening the hood!!
Refresher pics:
Now, the point of today's post....One of these was missing the HDD caddy. They're apparently nothing standard, and nearly impossible to find. I did locate one on ebay, and the buffoon had it priced @ $100 + ship and no 'best offer', it was the only one I found....I refuse to pay that for a little piece of plastic....
...so here we are...where the HDD's reside....
This is what the plastic caddy looks like.
Yea, now you see why I'm not paying a hundred bucks for that little piece of plastic.... This system is being built out for my wife, she's due for an upgrade and constantly grumbles about the tower & clusterflunk of wires under her desk.... It only need a single drive, not two....so lets get creative!!
Ironically enough, enter in a HP 2.5" to 3.5" SAS adapter. These can be had on ebay all day long for ~$8 shipped.
Plugs in....but absolutely nothing to attach it to. Standard screw layout for a 3.5" drive do not even begin to line up with the tracks on the onboard HDD cage.
...so I start by drilling 2x 1/8" holes in the AFT end of the HDD tray.
Next, I mark the location of the above shown drilled holes in the cage base and drill those out.
Next step is some 8mm brass case standoffs. These will allow the tray to be level inside the cage, so it won't stress the drive connect header.
Nuts on the back end. The cage is mounted on standoffs inside the AIO, these nuts clear the floor of the AIO case by a good 2mm.
Perfect!
480GB SSD installed.
Like it was born there!! Everything reassembled.
Win10 Enterprise installed. I did bump the MXM GPU up a little. It had a Quadro500M 1GB in it, and it was pretty weaksauce.... I had a Quadro K2200M 2GB in the bin....which is much nicer and will be stellar for what she does. Display is 2560x1440, very nice to look at!
The specs for this rig are:
HP Z1 Workstation AIO
Xeon E3-1280 v2 @ 3.6GHz <-- I also added that
16GB ECC PC3-12800
480GB SSD
Quadro K2200M 2GB GPU
Win10 Enterprise 22H2
The other one I'm building up will be similar to this one....just want to play around with the RAID functions....and I did add a stiffer GPU than this one....I'll give up the details on that one when it's finished....but wifey really likes this so far!
Attached Files
if you find these attachements useful please consider making a small donation to the site

 I didn't want to scrap it if I could fix it....it's worth rescuing IMHO.....the only one of about 20 computers I scrapped today.

") ).....no idea why I typed celeron.... I have some 1066 C2D's, I'll see if it plays nice with any of those.
).....no idea why I typed celeron.... I have some 1066 C2D's, I'll see if it plays nice with any of those.


 ...but I'm too far down the rabbit hole to scrap the build.....I guess every collection is allowed one turd build.


 ), as I had a little bit of time to catch up on this thread and read it "in peace".


 )
)
 That PS was the donor of the replacement +12v EPS cable.

Comment