Following on from the "Can't be worse than what's in there right now" I changed the "K.K" caps today on a customers Advantech PCM-5862 SBC.
(CPU fan had failed & baked it's caps)
Just as an aside I measured them in-circuit before the swap, ESR meter showed 0.1ESR...
When I took them out though; LOL, on two sitting on the same side I got no ESR reading at all, nor any capacitance reading!
For the other pair I got ESR of 50 & 90 respectively, and capacitance around half of what it should have been.
Are you surprised if I say the bluescreens disappeared after I recapped it?
Did a 20 minute run of Quake 2 after the recap, before it did not go 5 minutes, now there where no problems
And let me tell you what a glory that game is in software rendering; 640x480 on a 1MB graphics card, 64MB EDO RAM on a Pentium 100Mhz running in Win2K!
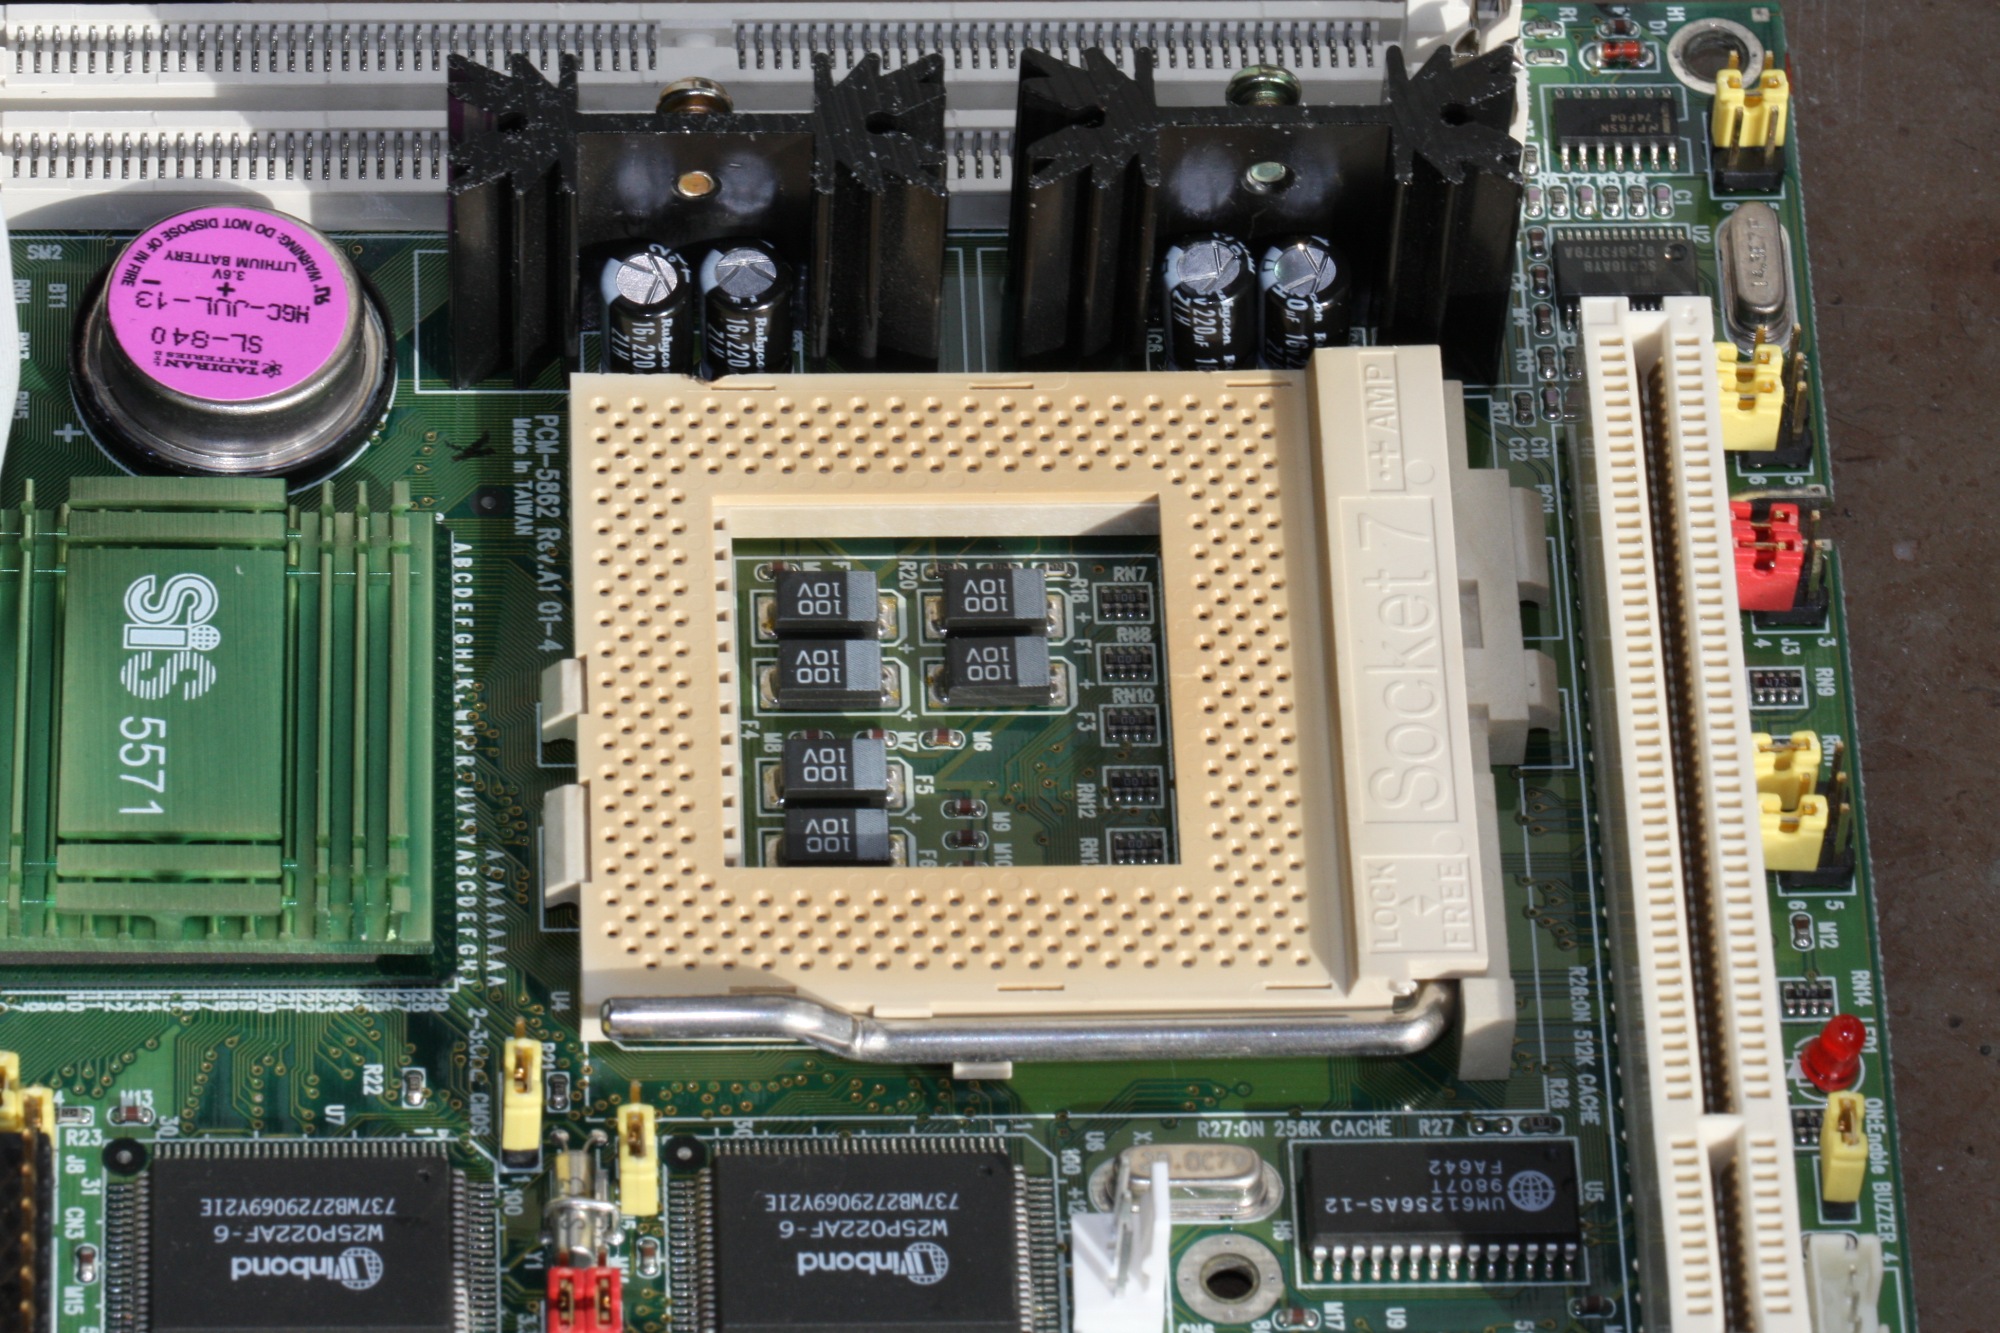
Just look at those proud new Rubycon ZLH caps and that amazingly heat discolored CPU socket
Compare the color with the 3-pin fan header at the bottom which I replaced because it fell to pieces due to being too overheated
There is also a new lithium battery soldered in, top left right above the fantastic SIS 5571 chipset.
Which doesn't support DMA and whose fantastic Award 4.51PG BIOS hangs with hard drives above 32GB in size!
So I had to limit the size of the new Transcend TS32GPSD330 SSD in size.
I hid 58300887 LBA's using HDAT2 making it match the original 12.7mm thick 2.5" HDD which had a giganormous size of 2167MB!
I don't think ROM-DOS v6.22 nor the Cybelec press brake software will complain about the missing size though.
It takes up all of ca 5MB or so including the customers programs
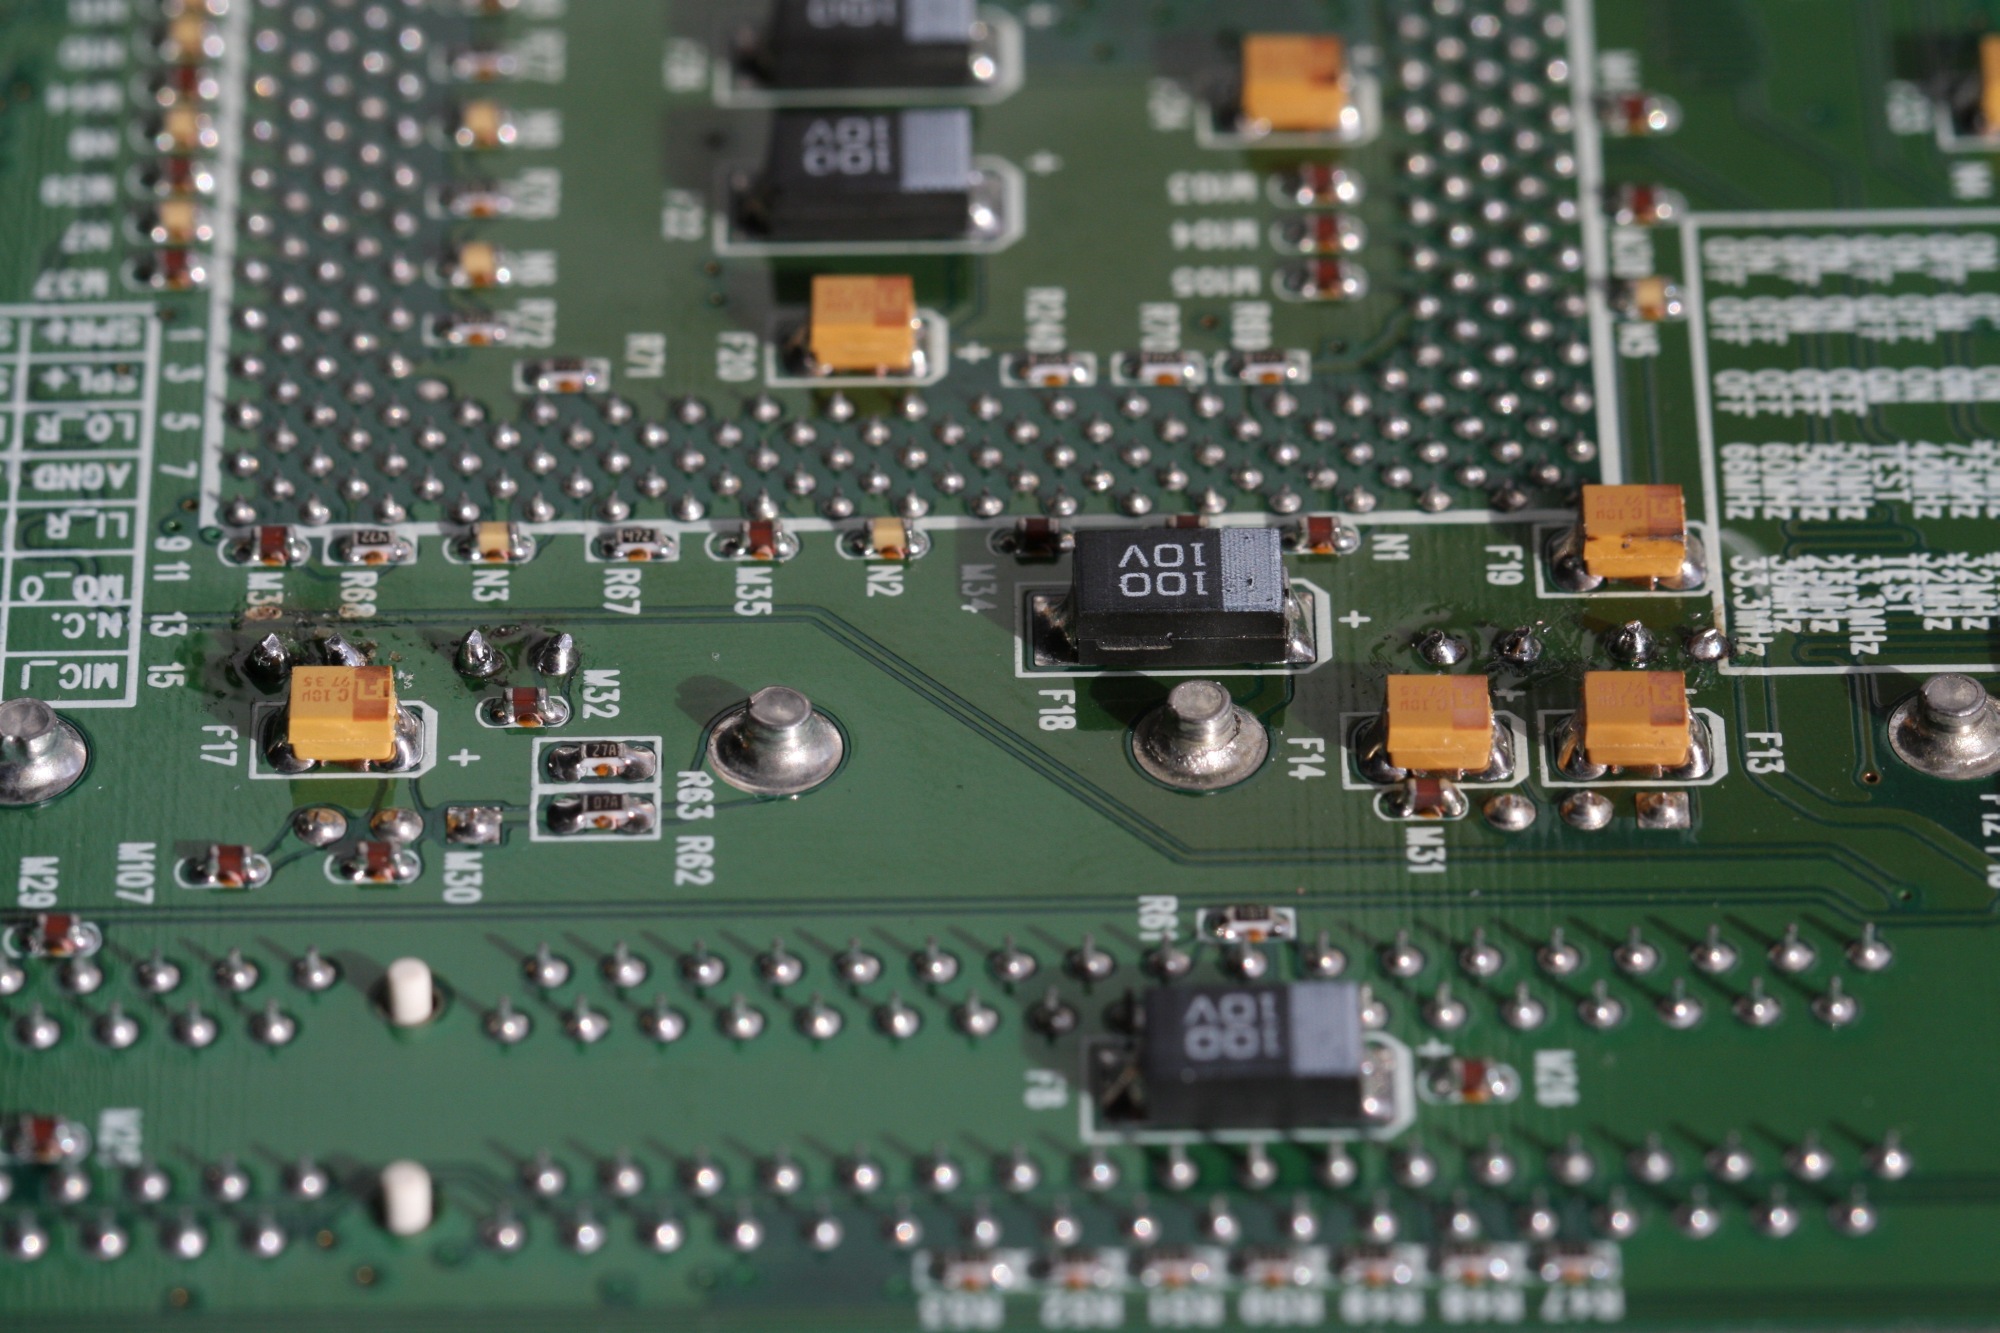
And here is the backside of the same, you can see the caps legs in the centerline of the picture, right by those large yellow capacitors.
There where also 2x tiny "K.K" 10uF 25v caps that I replaced with Panasonic NHG 10uF 50v caps.
By these where another lone "K.K" 220uF 16v cap, just like the ones by the CPU slot.
This is in the area around the Ethernet header so it has not become so hot.
Capacitance of this one was 220uF as specced and ESR was 2.6
The tiny caps had correct capacitance and their ESR was 21 & 23 respectively.
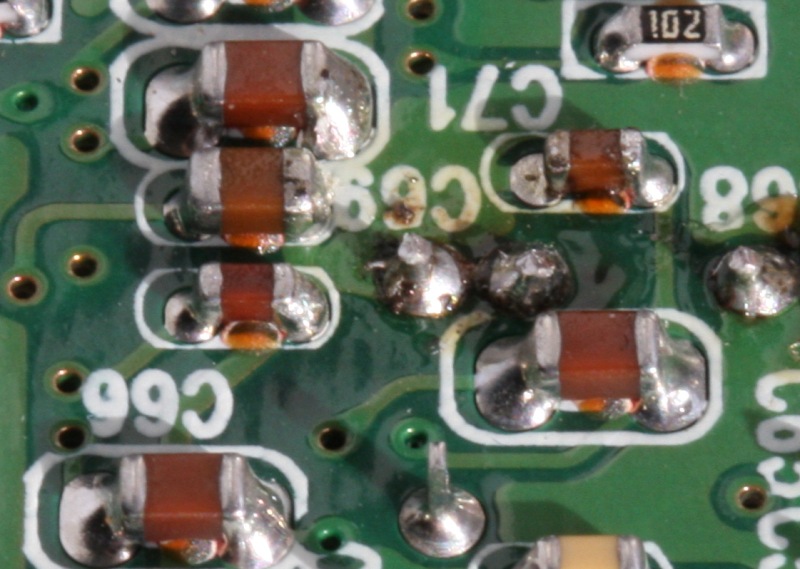
This is how they look on the backside after recapping:
Perhaps by now your starting to realize I'm posting more for the sake of showing off my new Canon EF 100mm F2.8L Macro lens
Well it's that and the fact that I've fallen in love with a "no clean" desoldering braid by CRC.
I've never been able to use braid to much success before but I changed the tip of my soldering iron to one designed for desoldering SMD components.
It's a huge tip compared to the small needle tip I had before.
It's simply amazing how well it works!
Talking out these caps was also a real breeze, since the tip is able to heat both legs at the same time!
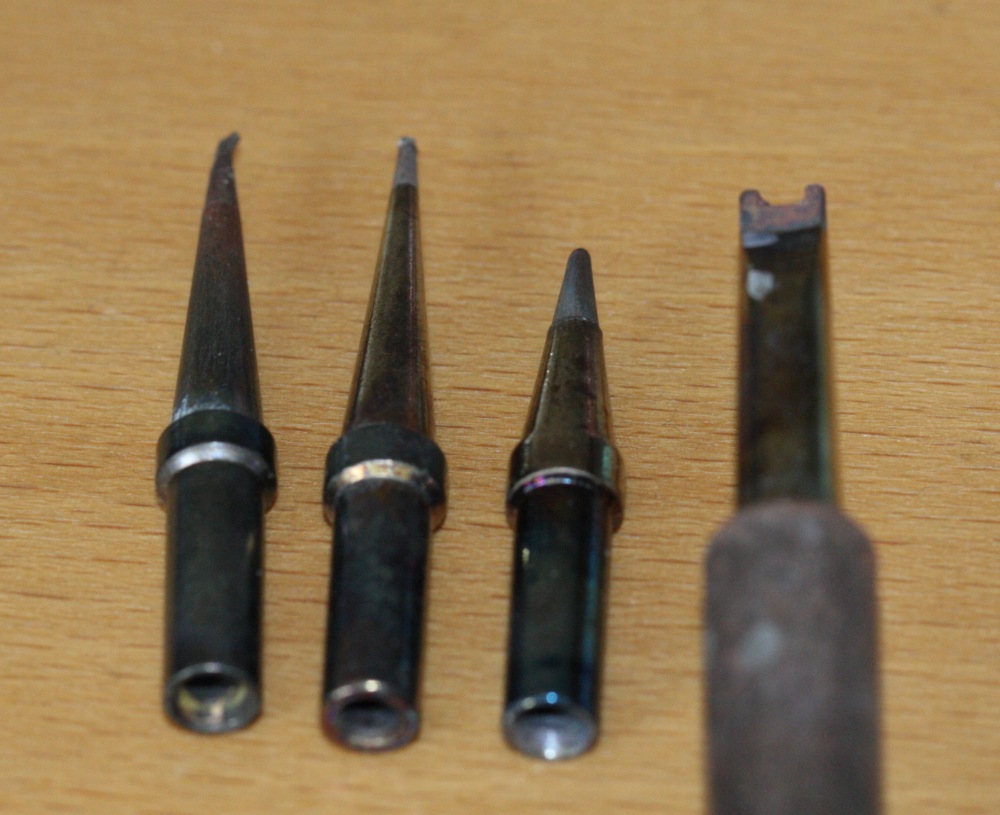
From left to right is my old needle tip which I worn out (tip broken)
Then one new of the same, and another with a slanted tip that I bought today.
Finally the SMD tip, I've actually had it for years but never used it, dunno why, it's amazing, nuff said!
On this board I also used a different technique for installing the caps, normally I always clear all holes with a stainless needle.
But this one, as you can see have very many SMD components cramped very close together, and the topside is also very cramped.
I only cleared the hole which the positive leg goes into, leaving the heat-sucking negative holes untouched (only used braid on them)
So I can put the cap in and then just heat the negative lead and it falls right through, worked really well!
(CPU fan had failed & baked it's caps)
Just as an aside I measured them in-circuit before the swap, ESR meter showed 0.1ESR...
When I took them out though; LOL, on two sitting on the same side I got no ESR reading at all, nor any capacitance reading!
For the other pair I got ESR of 50 & 90 respectively, and capacitance around half of what it should have been.
Are you surprised if I say the bluescreens disappeared after I recapped it?
Did a 20 minute run of Quake 2 after the recap, before it did not go 5 minutes, now there where no problems
And let me tell you what a glory that game is in software rendering; 640x480 on a 1MB graphics card, 64MB EDO RAM on a Pentium 100Mhz running in Win2K!
Just look at those proud new Rubycon ZLH caps and that amazingly heat discolored CPU socket
Compare the color with the 3-pin fan header at the bottom which I replaced because it fell to pieces due to being too overheated
There is also a new lithium battery soldered in, top left right above the fantastic SIS 5571 chipset.
Which doesn't support DMA and whose fantastic Award 4.51PG BIOS hangs with hard drives above 32GB in size!
So I had to limit the size of the new Transcend TS32GPSD330 SSD in size.
I hid 58300887 LBA's using HDAT2 making it match the original 12.7mm thick 2.5" HDD which had a giganormous size of 2167MB!
I don't think ROM-DOS v6.22 nor the Cybelec press brake software will complain about the missing size though.
It takes up all of ca 5MB or so including the customers programs
And here is the backside of the same, you can see the caps legs in the centerline of the picture, right by those large yellow capacitors.
There where also 2x tiny "K.K" 10uF 25v caps that I replaced with Panasonic NHG 10uF 50v caps.
By these where another lone "K.K" 220uF 16v cap, just like the ones by the CPU slot.
This is in the area around the Ethernet header so it has not become so hot.
Capacitance of this one was 220uF as specced and ESR was 2.6
The tiny caps had correct capacitance and their ESR was 21 & 23 respectively.
This is how they look on the backside after recapping:
Perhaps by now your starting to realize I'm posting more for the sake of showing off my new Canon EF 100mm F2.8L Macro lens
Well it's that and the fact that I've fallen in love with a "no clean" desoldering braid by CRC.
I've never been able to use braid to much success before but I changed the tip of my soldering iron to one designed for desoldering SMD components.
It's a huge tip compared to the small needle tip I had before.
It's simply amazing how well it works!
Talking out these caps was also a real breeze, since the tip is able to heat both legs at the same time!
From left to right is my old needle tip which I worn out (tip broken)
Then one new of the same, and another with a slanted tip that I bought today.
Finally the SMD tip, I've actually had it for years but never used it, dunno why, it's amazing, nuff said!
On this board I also used a different technique for installing the caps, normally I always clear all holes with a stainless needle.
But this one, as you can see have very many SMD components cramped very close together, and the topside is also very cramped.
I only cleared the hole which the positive leg goes into, leaving the heat-sucking negative holes untouched (only used braid on them)
So I can put the cap in and then just heat the negative lead and it falls right through, worked really well!
Attached Files


Comment