Announcement

Collapse
No announcement yet.

Steinberg UR44 Audio Interface No Power.

Collapse
X
 
  • Filter
  • Time
  • Show
Clear All
new posts

    Steinberg UR44 Audio Interface No Power.

    I have a Steinberg UR44 audio interface that I had in storage for a few years, and now that I want to use it doesn't power on. I want to take this opportunity to learn electronics repair so I am trying to repair it for learning experience.

    I am looking for guidance on how to proceed with troubleshooting the problem.

    I have checked the original power supply with a multi meter and it works.

    I visually inspected the PCB board and don't see any issues, except what looks like a possible broken fuse but not sure. I checked it for continuity it reads 97 ohms, but 3 components that light up for a split second when I press the power button on the audio interface when I inspect the PCB board with a thermal camera.

    Link to video showing the 3 components heat up for a split second everytime I press the power button
    https://imgur.com/a/baUEack


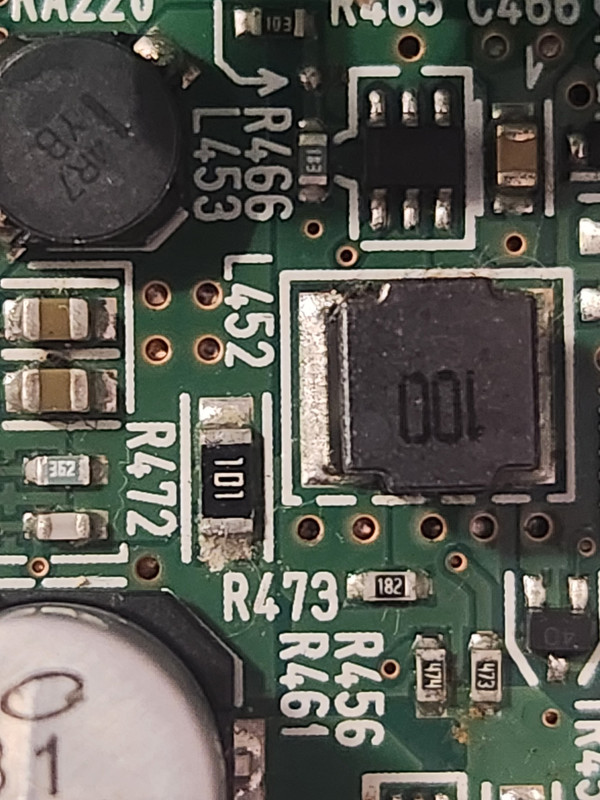
    This pictures shows where the power jack is(blue circle), which is right next to the power button, and the barely visible green square shows the area where the 3 components are heating up/lighting up for a split second when inspected with the thermal camera.


    I am new to electronics repair, how should I proceed from here in troubleshooting the problem?

    Thanks for the help.
    Last edited by Young_Silent_Made_IT; 12-08-2023, 05:41 PM.

    #2
    Try the usb as a power source and see what happens then. Upload some high resolution pictures using the attachment function. These pics you posted are off site and I can't load them to zoom in.

    i would go and see if the voltage regulator or buck converter is shot. You probably need some hot air to replace SMD components. Could be also a shorted mlcc SMD capacitor.
    Last edited by CapLeaker; 12-10-2023, 10:13 AM.

    Comment


      #3
      Looks like that 100R ohm resistor next to the 10uH inductor coil heats up pretty fast. Something is definitely shorted to ground.

      And yes, it's a resistor, not a fuse. A fuse will always read 0 ohm, and a blown fuse has no reading at all/no continuity.

      Please attach a zoomed in hi-res photo of the area, preferaby with a clear shot (meaning readable) of the marking on that 6 pin IC next to R466.

      I recommend to use two soldering iron (60W) with flat duckbill solder tips to remove a component. You can bridge a multi-pin component with lots of leaded solder to lower the melting point of lead free solder.

      Don't use hot air because the PCB is densely packed and with hot air you will just mess up everything.

      Comment


        #4
        This statement above isn't quite correct. There are things called fusible resistors too.

        Comment


        • прямо
          прямо commented
          Editing a comment
          Indeed there are fusible resistors, but that is not what is installed on the PCB 🤣

        #5
        holy cross-post Batman
        https://www.edaboard.com/threads/ste...-power.409265/
        https://www.eevblog.com/forum/repair...91/#msg5209791
        https://maker.pro/forums/threads/ste.../#post-1850594
        https://forum.allaboutcircuits.com/t...-power.197742/
        https://www.reddit.com/r/AskElectron...face_no_power/
        Last edited by redwire; 12-13-2023, 04:02 PM. Reason: added url

        Comment


        • Young_Silent_Made_IT
          Young_Silent_Made_IT commented
          Editing a comment
          lol. Did you recognize the cross post and then googled or?

        #6
        Dayum!

        Comment


          #7
          "I am new to electronics repair" well new to Internet etiquette and learn that first.
          People think they're entitled to instruction and other's advice and time. It pisses me off when more info, more pics are posted on other sites and there's no followup on actions taken from them.
          So I've learned to check before stepping in and not offering help to vampires...
          Last edited by redwire; 12-13-2023, 04:01 PM.

          Comment


            #8
            Originally posted by redwire View Post
            "I am new to electronics repair" well new to Internet etiquette and learn that first.
            People think they're entitled to instruction and other's advice and time. It pisses me off when more info, more pics are posted on other sites and there's no followup on actions taken from them.
            So I've learned to check before stepping in and not offering help to vampires...
            Apologies for the late reply. I am just very busy these days with work, studies, learning about electronics, doing repairs around the house, and a lot of research. I appreciate all the help people have been giving me. I am here to learn and maybe be helpful when I know more about electronics repair.
            Last edited by Young_Silent_Made_IT; 12-13-2023, 04:34 PM.

            Comment


              #9
              Originally posted by CapLeaker View Post
              Try the usb as a power source and see what happens then. Upload some high resolution pictures using the attachment function. These pics you posted are off site and I can't load them to zoom in.

              i would go and see if the voltage regulator or buck converter is shot. You probably need some hot air to replace SMD components. Could be also a shorted mlcc SMD capacitor.
              Apologies for the late reply.

              I Tried the USB power source, the audio interface still won't power on. It is completely dead.
              Attached Files

              Comment


                #10
                Originally posted by прямо View Post
                Looks like that 100R ohm resistor next to the 10uH inductor coil heats up pretty fast. Something is definitely shorted to ground.

                And yes, it's a resistor, not a fuse. A fuse will always read 0 ohm, and a blown fuse has no reading at all/no continuity.

                Please attach a zoomed in hi-res photo of the area, preferaby with a clear shot (meaning readable) of the marking on that 6 pin IC next to R466.

                I recommend to use two soldering iron (60W) with flat duckbill solder tips to remove a component. You can bridge a multi-pin component with lots of leaded solder to lower the melting point of lead free solder.

                Don't use hot air because the PCB is densely packed and with hot air you will just mess up everything.
                I added hi-res pictures to the post. This board will probably be used so I can practice soldering/desoldering since according to the experts, it is a very difficult device to repair.

                Comment


                • прямо
                  прямо commented
                  Editing a comment
                  Hmm.... experts, huh?

                  What a waste to use a perfectly good board as a scrap for practicing soldering/desoldering. Better send the audio interface to me as a Christmas gift and you go practice on a cheap $3 PCIe sound card 😁

                  Anyway, your thermal camera already shown you where the problem is.

                  FT450 could be faulty. It's that 6 pin SMD part with a marking code "UA", which unfortunately, I don't know what exactly it is. Maybe someone else can ID it.

                  Can you measure the resistance to ground of R472 on its pin that is facing FT450?

                  Also check if the big capacitor 470uF (C464) next to FT450 is shorted or not. If you can measure its ESR while in circuit that'd be very helpful, because visually, it looks to be a bit bulging. Pretty easy to remove it though. Use a soldering iron to heat up one leg until the solder melts then gently lift the leg up with a pointy tweezer, and repeat the same process with the other leg until the cap came off of the board. Don't use force.

                  Edit: Oh i forgot that I suggested in earlier post to use two soldering irons to remove components. Here's a video of how to remove the cap with two soldering irons. Then you can check the cap's ESR.
                  https://www.youtube.com/watch?v=D2wQKKO1W6k
                  Last edited by прямо; 12-14-2023, 10:29 PM.
              Working...
              X